The Windows Registry is a critical database that stores configuration settings and options for the Windows operating system and installed applications. Making changes to the Registry can have a significant impact on the system’s performance and behavior. Therefore, it is crucial to back up the Registry before making any modifications. In this article, we will explore how to backup and restore Registry settings in Windows 10 and 11.

Why Backing Up the Registry Is Important?
The Windows Registry is a complex database, and even minor changes to it can lead to unforeseen issues, such as system instability, software malfunctions, or even the inability to boot into Windows. A backup acts as a safety net, allowing you to revert to a previous working state in case something goes wrong during Registry editing.
How to Back up the Registry in Windows 10/11
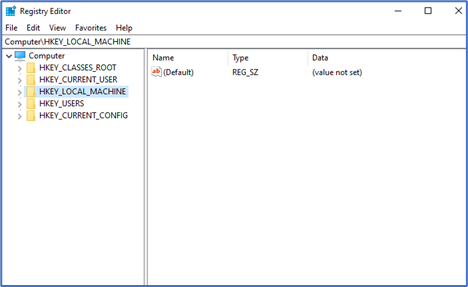
Once the Registry Editor is open, follow these steps:
- In the Registry Editor window, make sure you’ve selected “Computer” at the top to back up the entire Registry.
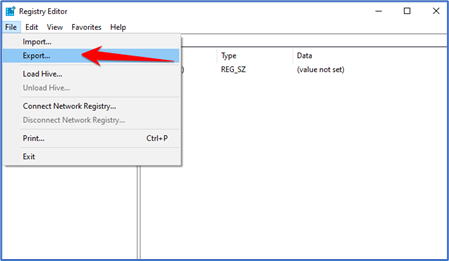
- Click on the “File” menu in the top-left corner and select “Export.”
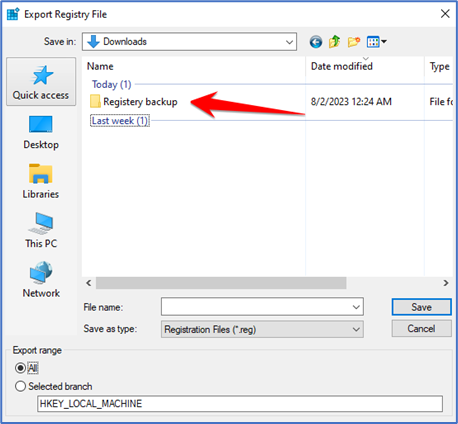
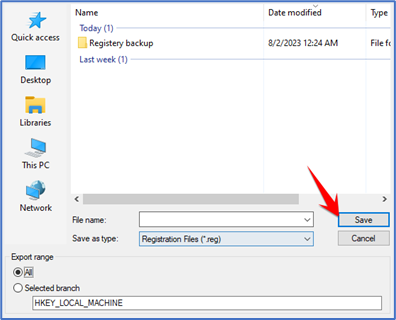
- Choose a safe location to save the backup file. It’s recommended to create a new folder specifically for Registry backups. Give the backup file a descriptive name, preferably with the date appended to it, for easy identification later.
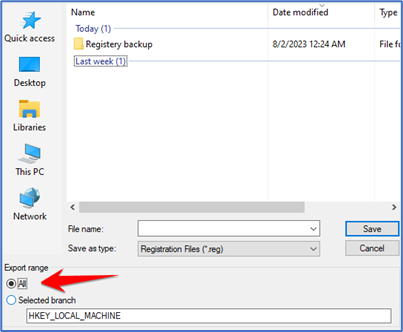
- Select “All” under the “Export range” section to back up the entire Registry.
- Choose the location and click “Save.”
Windows will create a .reg file containing the exported Registry settings. This file can be used later to restore the Registry.
How to Restore the Registry in Windows 10/11
1. Open the Registry Editor
Ensure you have administrative privileges on your Windows computer, then open the Registry Editor as described earlier.

2. Restore the Backup
To restore the Registry settings from the backup file, follow these steps:
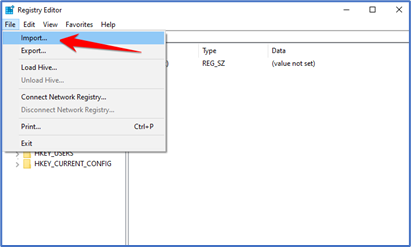
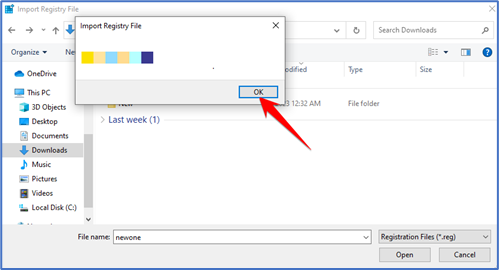
- In the Registry Editor, click on the “File” menu in the top-left corner and select “Import.”
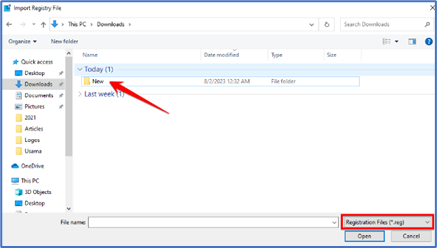
- Navigate to the location where you saved the backup file (.reg) and select it.
- Click “Open” to begin the restoration process.
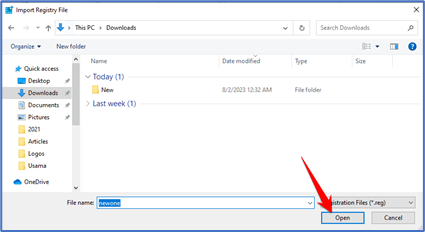
- You may receive a confirmation prompt; click “Yes” to proceed with the restoration.
Windows will import the settings from the backup file, and the changes will take effect immediately.
Backing up and restoring Registry settings in Windows 10/11 is a straightforward process that can save you from potential disasters caused by Registry errors. Taking the time to create regular backups ensures that you can quickly recover your system to a stable state if anything goes wrong during Registry modifications.
That’s it!!