Windows has two general account types, the “Standard” user, who gains access to a selected number of features and functions, and the “Administrator”, who can perform more advanced tasks such as app installation, global settings changes, and command execution. Today, we’re going to show you how to change a user account to an administrator in Windows 10 or Windows 11.
Before we start, however, it’s worth thinking through the implications of making the change to an administrator account. You should understand that you are granting this user full control over their PC. This includes the ability to see and interact with other admins’ files, install authorized programs (including malware), bypass blocking software, or entirely wipe the PC.
Instead, for some users, you may be better served to retain the standard account but enter the administrator password for them when they want to make advanced changes. This way, you can vet any changes to the device before agreeing to them.
With that said, if you’re sure you want to change a user to an administrator in Windows 10 or 11, you can follow along below:
How to Make a User an Administrator in Windows 11 or Windows 10 via Settings
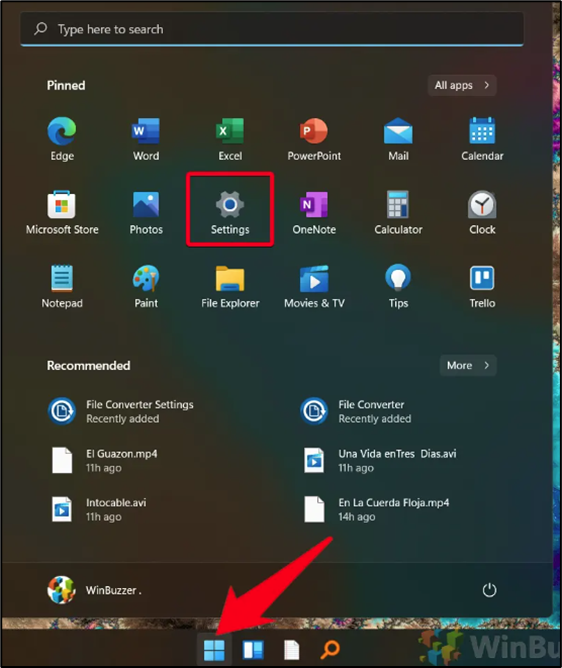
Press Start and press the “Settings” icon on your Start menu If you’re on Windows 10, you’ll want to press the settings cog above the power menu, instead
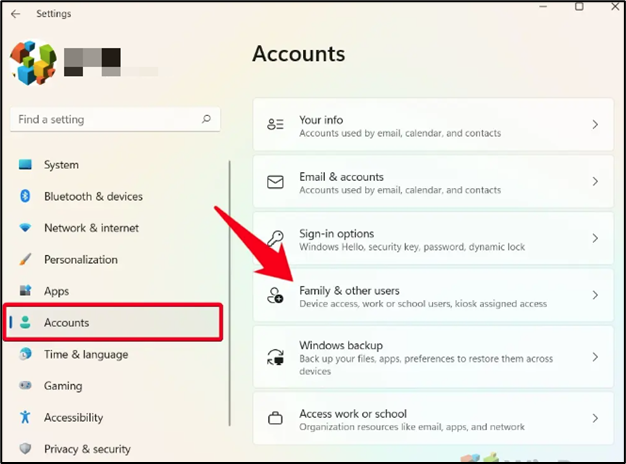
Select “Accounts” in the sidebar, then press “Family & other users”
In Windows 10, you’ll press the “Accounts” icon instead, then select “Family & other users” in the sidebar.
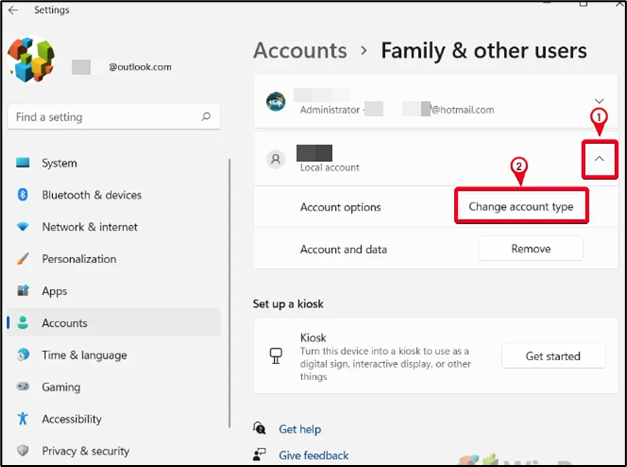
Press the expand the user and click “Change account type”
In Windows 10, “Change account type” will also show up when you click the person’s name.
Choose “Administrator” from the list and press “OK”
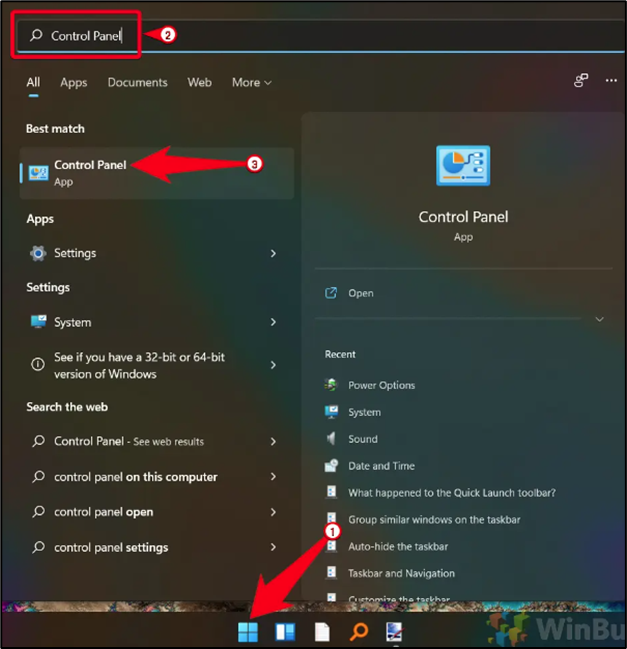
If you prefer a classic UI, you can achieve the same goal in around the same amount of time using the Control Panel app. This has the advantage of being unified between OSes:
Press Start and type “Control Panel”, then click the top result
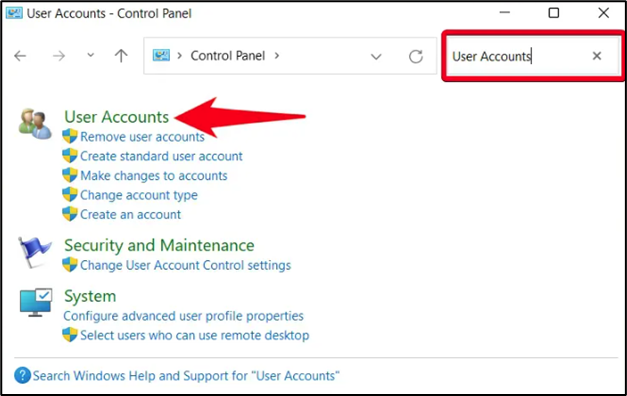
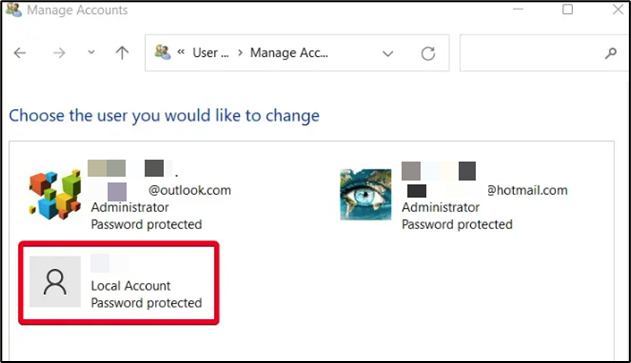
Search for “User Accounts” in the Control Panel search bar and click the “User Accounts” heading
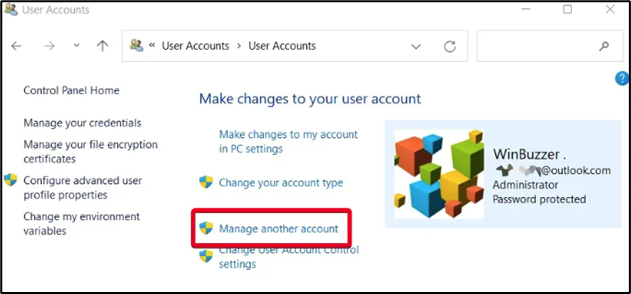
Press “Manage another account”
You’ll have to provide administrator credentials to perform this step.
If you want to know how to make yourself an administrator in Windows 11, the answer is to press “Change your account type” here instead and provide an admin password.
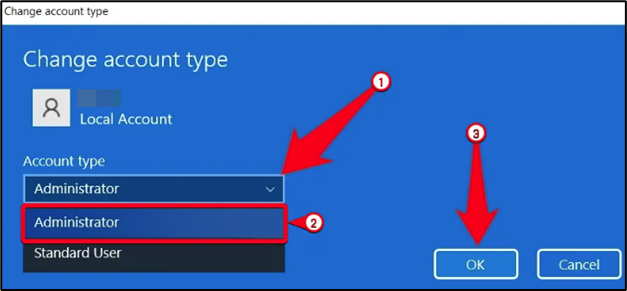
Select the user account you’d like to change to an administrator
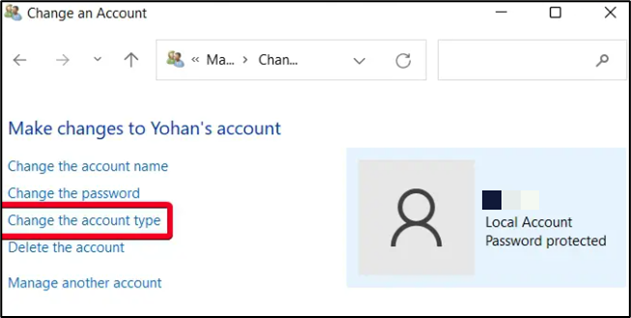
Press “Change the account type”
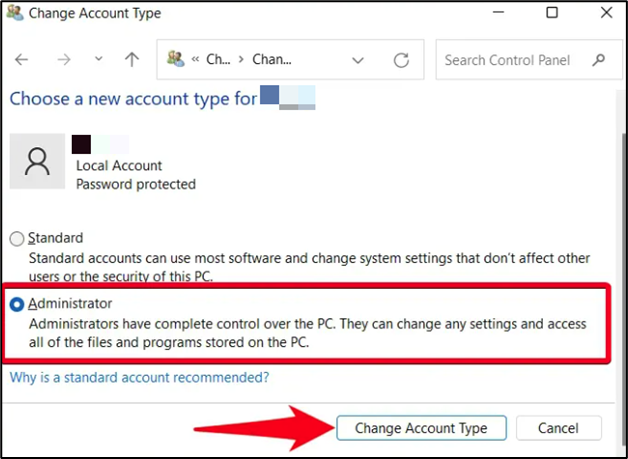
Select “Administrator” and press “Change Account Type”
How to Give Administrator Permission in Windows 11 or Windows 10 with Computer Management
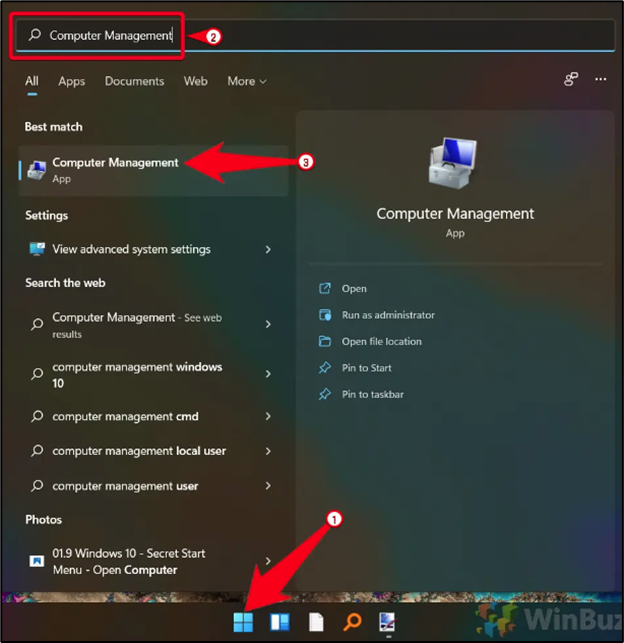
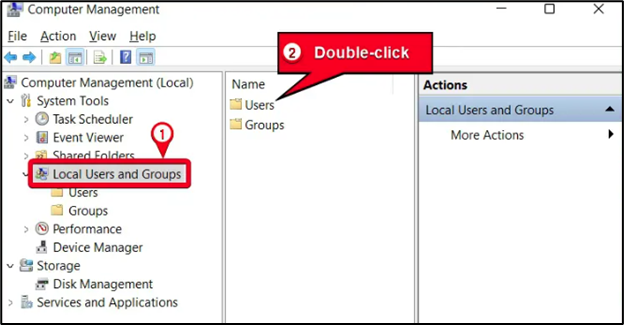
A more advanced way to make a user an administrator in Windows 11 or 10 involves the use of the “Computer Management” tool. This should be available regardless of whether you have a Pro or Home edition.
Press Start and type “Computer Management”, then click the top result
Open “Local Users and Groups” in the sidebar and double-click “Users” in the main pane
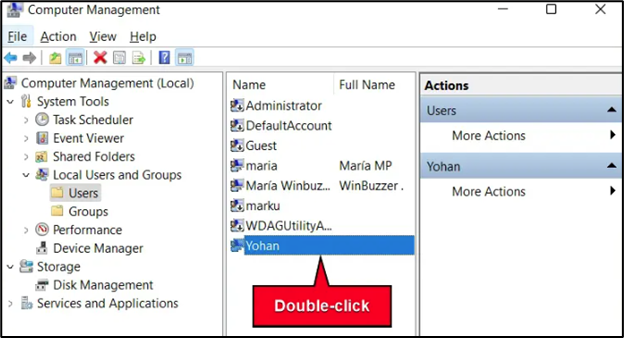
Double-click the user you want to make an admin
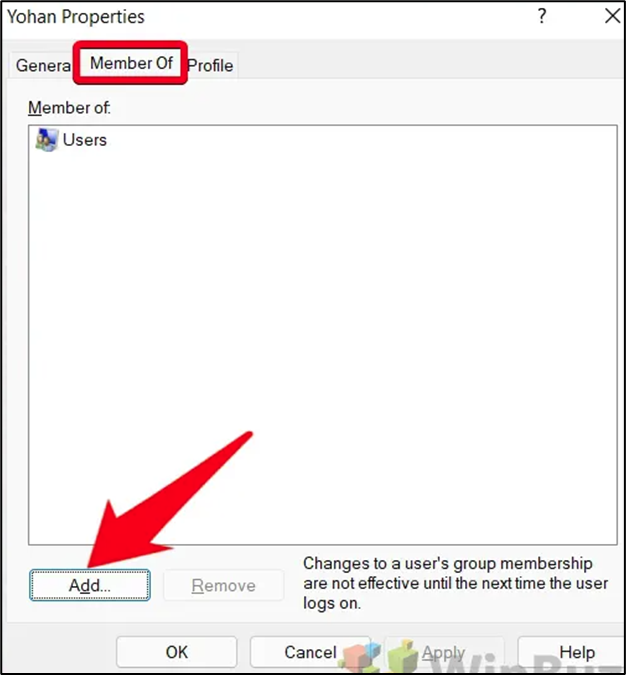
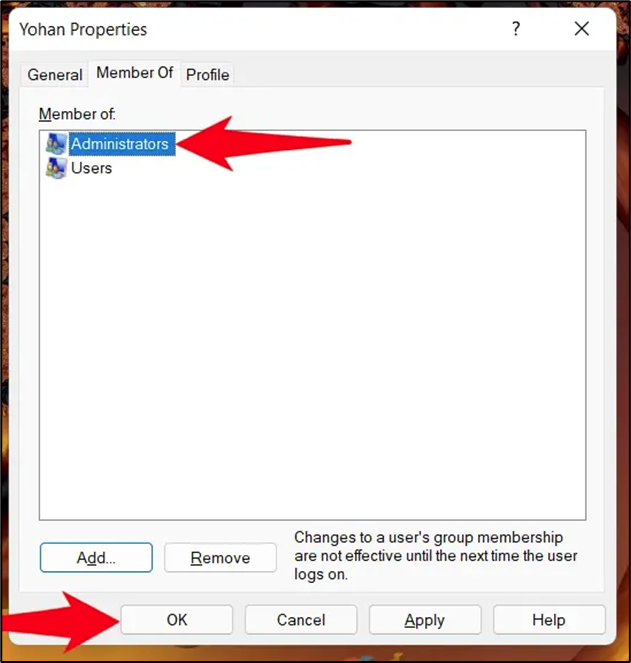
Open the “Member Of” tab and press “Add…”
Type “Administrators” in the “object names” field and press “OK”
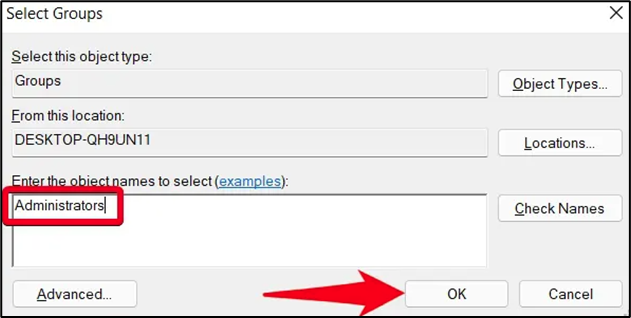
Check that the user is now a member of “Administrators” and press “OK” again
You can repeat this process for any other users you’d like to give administrator permissions to.
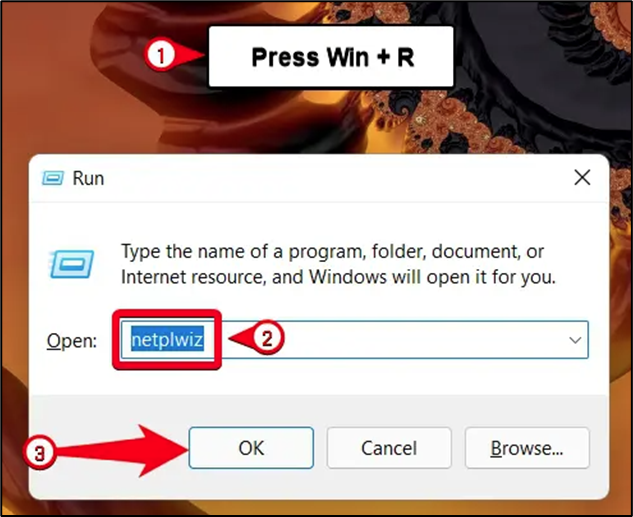
How to Make Yourself (or Another User) an Administrator in Windows 11 or 10 via netplzwiz
Netplzwiz is the dedicated user accounts tool in Windows 10 and Windows 11. By opening it directly and cutting out the middleman, you can very quickly give the administrator permission to a user:
Press Windows + R, type “netplwiz” and click “OK”
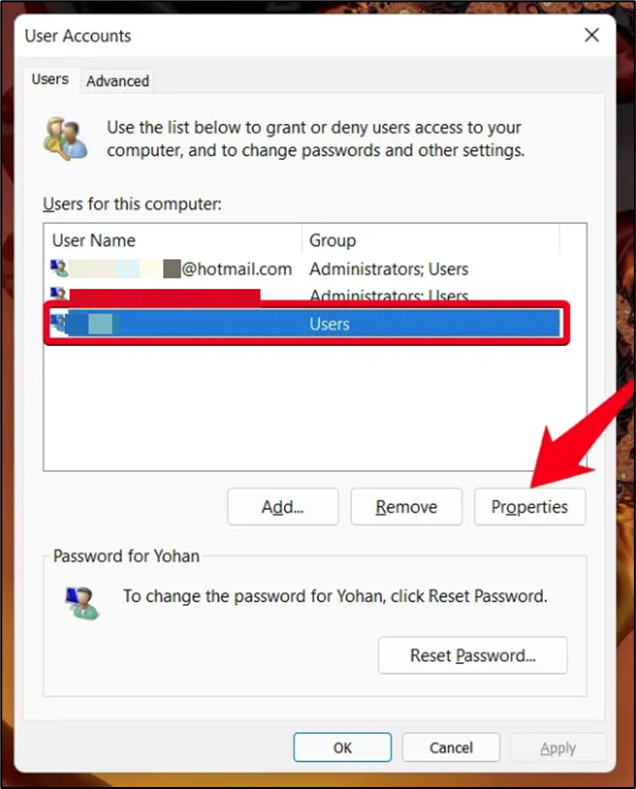
Select the user you want to modify and click “Properties”
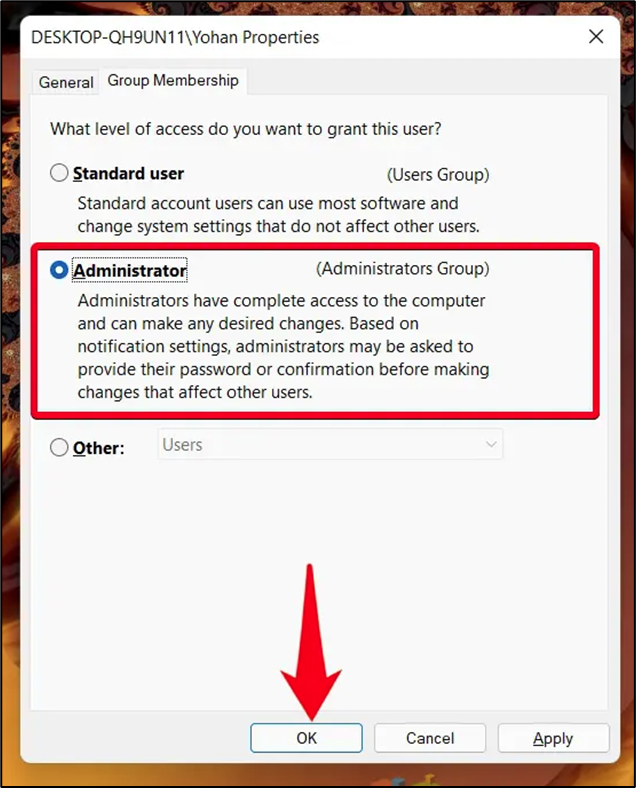
Tick “Administrator” and press “OK”
How to Make a User an Administrator in Windows 11 or Windows 10 Using CMD
If you want to forgo the UI entirely, Command Prompt is another option. The net localgroup command lets you quickly change an account’s permissions without being too difficult to remember.
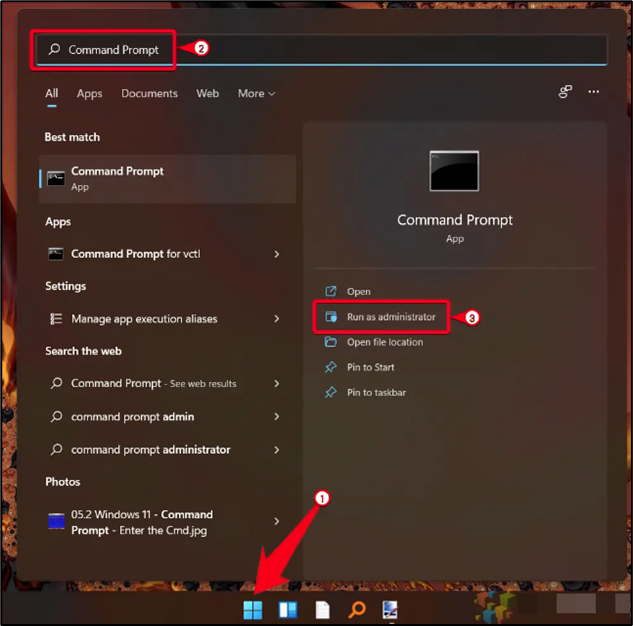
Press Start and type “Command Prompt”, then press “Run as administrator” on the right-hand side
You will need to run Command Prompt as an administrator to make this change, so obtain your admin’s permission if necessary.
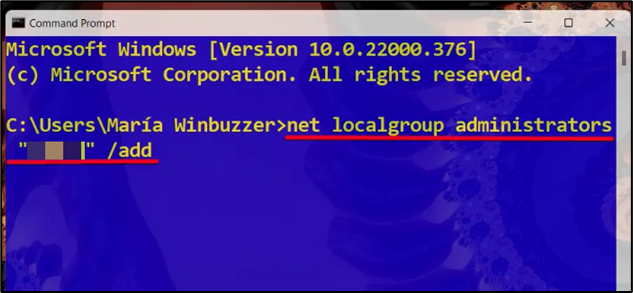
Type the change administrator command and press Enter
In your CMD window, write the following, replacing “User” with the full username of the account:
net local group administrators “User” /add
How to Create an Administrator in Windows 11 or Windows 10 With PowerShell
As is typical, you can use a PowerShell command to perform the same action if that’s your preference. The command is a little harder to remember, but it’s still pretty easy:
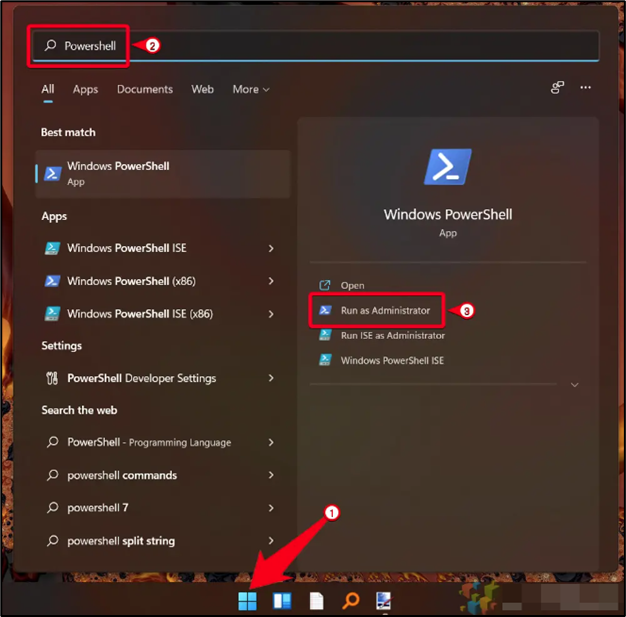
Open PowerShell as an admin
Press Start and type “Powershell”, then click “Run as Administrator” on the right-hand side.
Type the local group command and press Enter
In PowerShell, the command you want to type is as follows:
Add-LocalGroupMember -Group “Administrators” -Member “User”
As with Command Prompt, you should replace “User” with the full name of the user account that you want to give administrator permissions.

Extra: How to Enable the Hidden Administrator Account
With that done, you may also want to consider enabling the hidden administrator account. It comes with some extended privileges over the regular admin account that may be useful to you in certain cases.

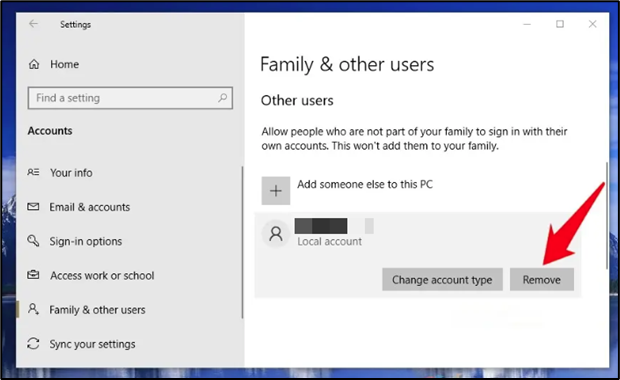
Extra: How to Delete a User Account in Windows
Now that you know how to change the administrator account in Windows 10 and Windows 11, you may want to delete your old one. You can do so by following our dedicated guide.