Windows 10\11, Microsoft’s widely-used operating system, offers various features and customizations to enhance user experience and security. One such feature is the lock screen, which appears every time you wake your computer from sleep or when you boot up. While the lock screen serves as an added security layer, it can be an inconvenience for some users, especially those who use their computers in private settings. Fortunately, disabling the lock screen in Windows 10 is a straightforward process. In this article, we will guide you through the steps to disable the lock screen and gain quicker access to your desktop.

The first step to disabling the lock screen involves editing the Windows Registry. The Registry is a vital database that stores settings, options, and information for Microsoft Windows. To access it, follow these steps:
- Press the Windows key + R on your keyboard simultaneously. This will open the “Run” dialog box.
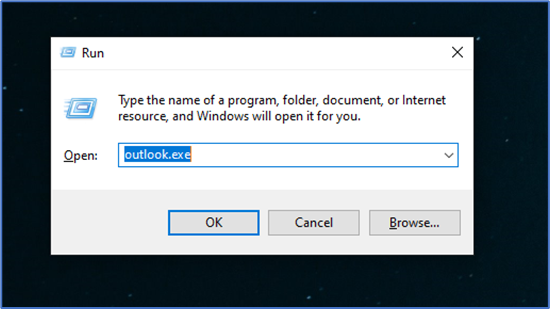
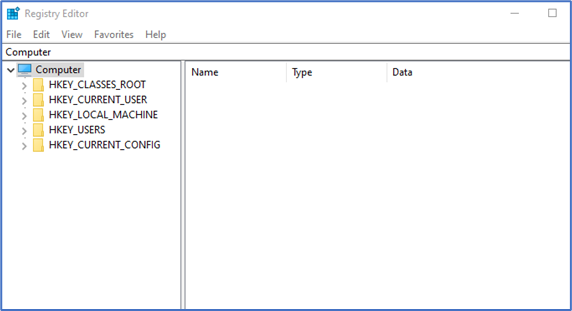
- Type “regedit” in the “Run” dialog box and press Enter. This action will launch the Registry Editor.
Navigate to the appropriate Registry Key
Now that the Registry Editor is open, you need to navigate to the correct registry key. Here’s how:
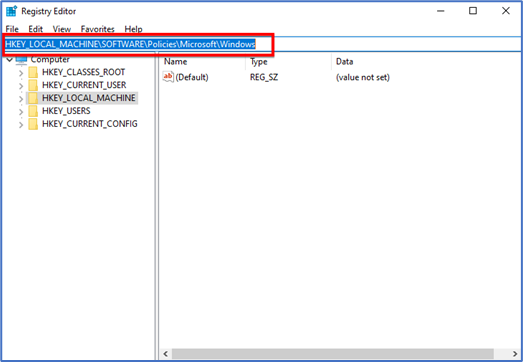
- In the Registry Editor, locate the following path in the left-hand side navigation pane: HKEY_LOCAL_MACHINE\SOFTWARE\Policies\Microsoft\Windows
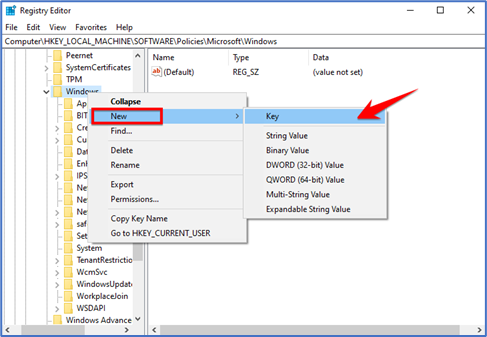
- If you don’t see a “Personalization” key within the “Windows” folder, you’ll need to create it. Right-click on the “Windows” folder, select “New,” and then choose “Key.” Name the new key as “Personalization.”
Create a Registry Entry to Disable the Lock Screen
With the “Personalization” key selected, it’s time to create the entry that will disable the lock screen:
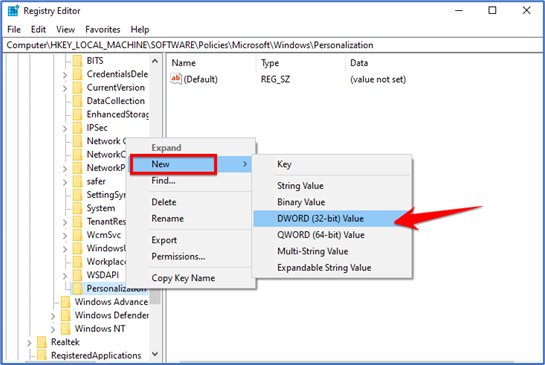
- Right-click on the right-hand side of the Registry Editor and choose “New.”
- Select “DWORD (32-bit) Value” from the menu.
- Name the new entry as “NoLockScreen.”
Modify the Registry Entry
Now that you have created the “NoLockScreen” entry, you must modify its value to disable the lock screen:
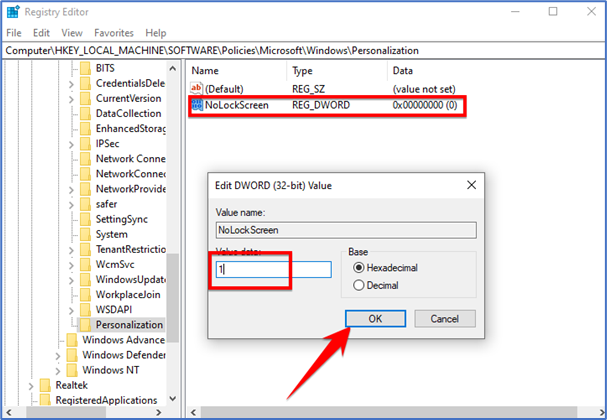
- Double-click on the “NoLockScreen” entry.
- In the “Edit DWORD (32-bit) Value” window, change the value data to “1.”
- Click “OK” to save the changes.
Restart Your Computer
That’s it; you are done! Now restart your computer, and you won’t see the lock screen anymore.
Second method:
2. Using Group Policy Editor
You can also use Local Group Policy Editor to disable the lock screen on Windows 10 computers. To do that, follow some of the simple steps given below.
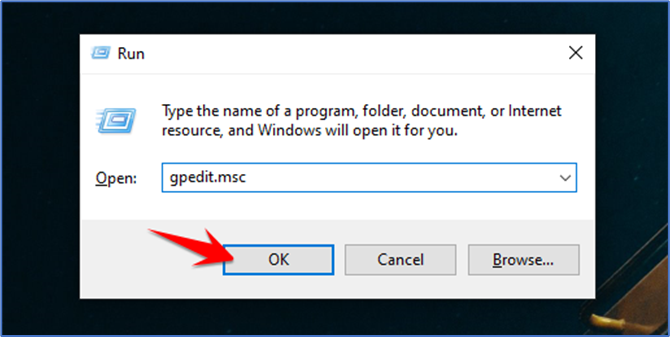
- To begin, press the Windows key and the letter “R” simultaneously, then type “gpedit.msc” in the provided field and hit the Enter key.
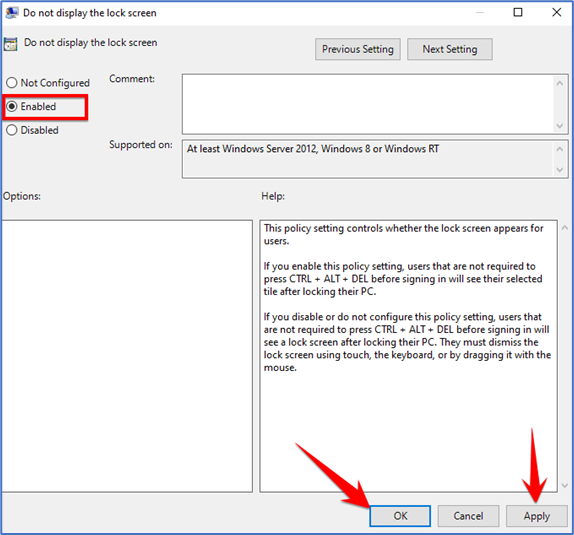
- To proceed, you should navigate to the following folder path: Computer Configuration\Administrative Templates\Control Panel\Personalization. Now double-click on the option “Do not display the lock screen”.
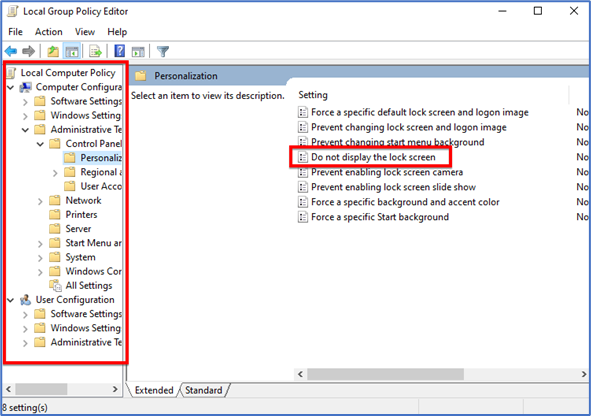
- After accessing the “Do not display the lock screen” option, select “Enabled” to activate the setting. Once you have chosen this option, click on “Apply” to save and apply the changes
That’s it; you are done!
Third method:
3. Using UAC Settings
This technique utilizes the User Account Settings to bypass the Windows 10 login. Below are easy-to-follow steps to skip the login using the user account settings.
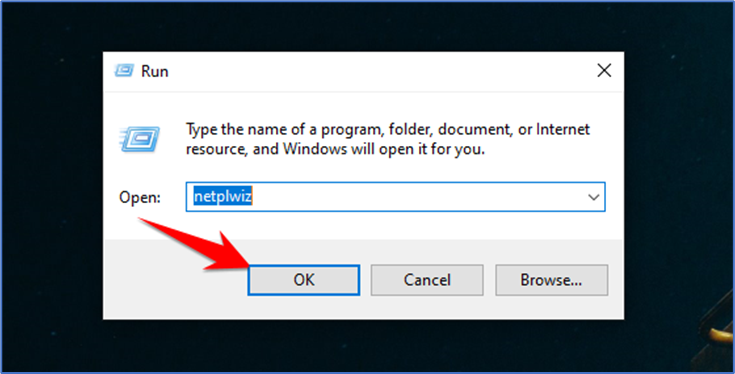
- Initially, press the combination of the Windows Key + R on your keyboard. This action will prompt the opening of the Run Dialog box. Within the Run Dialog box, type ‘netplwiz’ and then press the ‘OK’ button.
- Executing the provided command will direct you to the User Accounts page. Once there, you should deselect the option that reads ‘User must enter a user name and password to use this computer’.
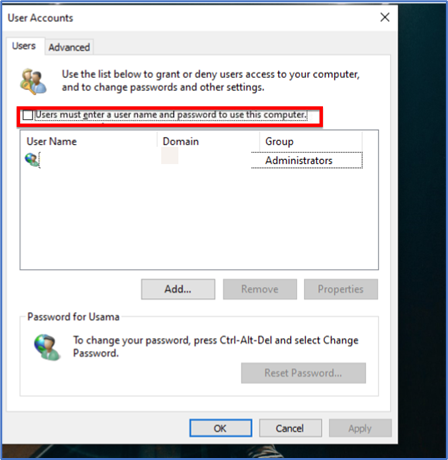
- Once done, click on the Ok button.
That’s it! You are done. Now you won’t see the login screen on Windows 10.
Therefore, the preceding discussion covers the process of disabling the Windows 10 lock screen. I trust this article has been beneficial to you! Don’t hesitate to share it with your friends as well.