If you encounter this error, there’s no cause for concern, as it can be readily resolved. Let’s delve into the available solutions.
Step 1: Using Device Manager
- First, you have to Press Windows + R, and then type in “devmgmt.msc”.

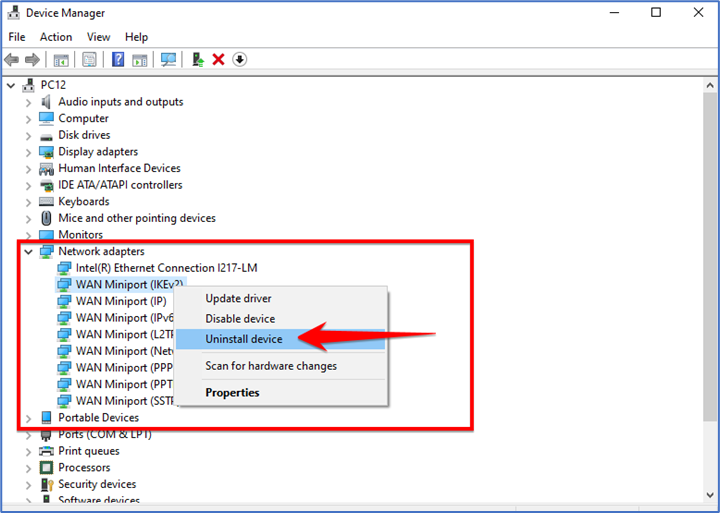
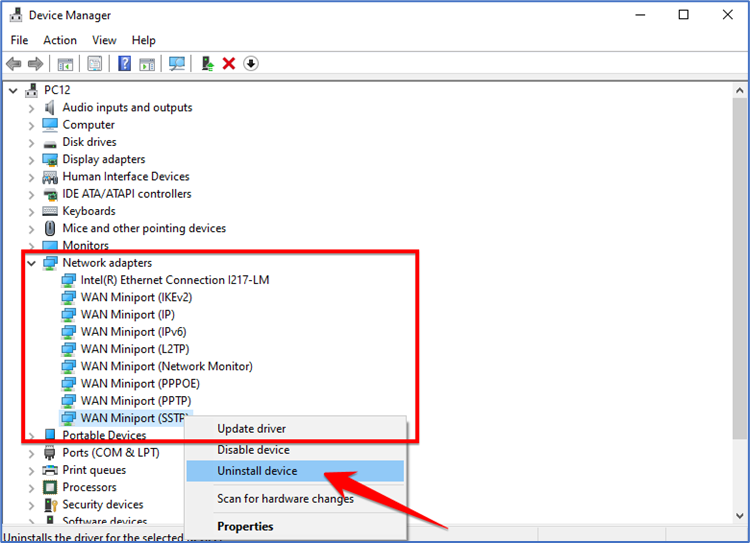
- This window opens the Device Manager and navigate to the Network Adapter section. Locate WAN Miniport (IKEv2) and right-click on it. From the options provided, select Uninstall device.
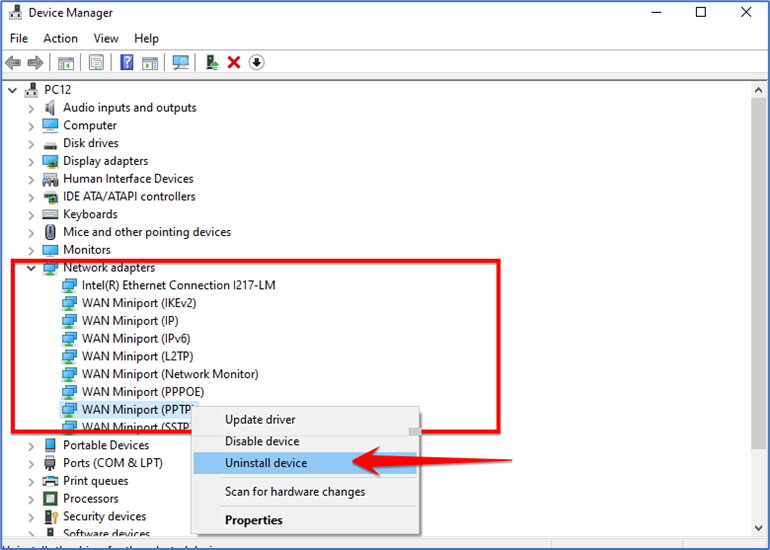
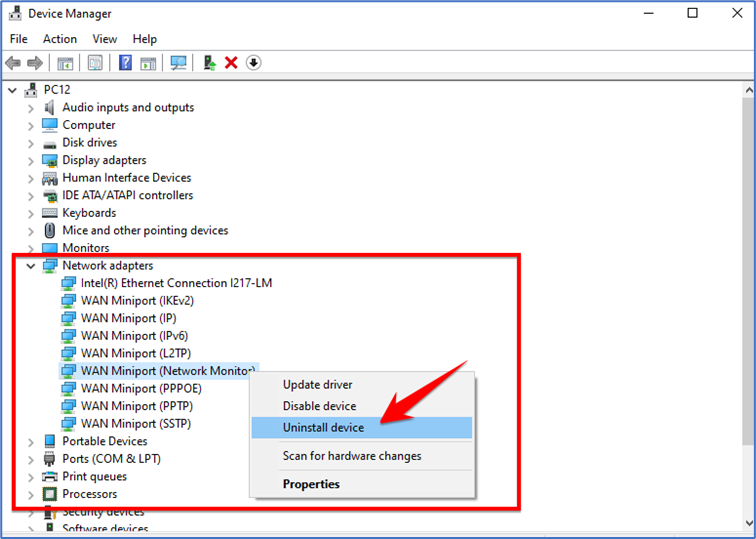
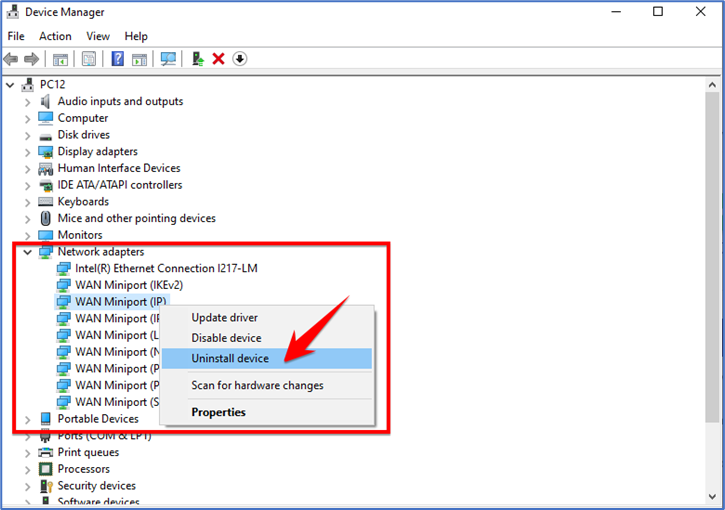
We have to repeat the previous step for each Miniport listed below individually, ensuring that you uninstall the device for each one:
- WAN Miniport (PPTP)

- WAN Miniport (PPPOE)
- WAN Miniport (Network Monitor)
- WAN Miniport (L2TP)

- WAN Miniport (IPv6)

- WAN Miniport (IP)
- WAN Miniport (SSTP)
- Locate the Action tab located at the top of the window and click on it. From the options presented, select “Scan for hardware changes”.
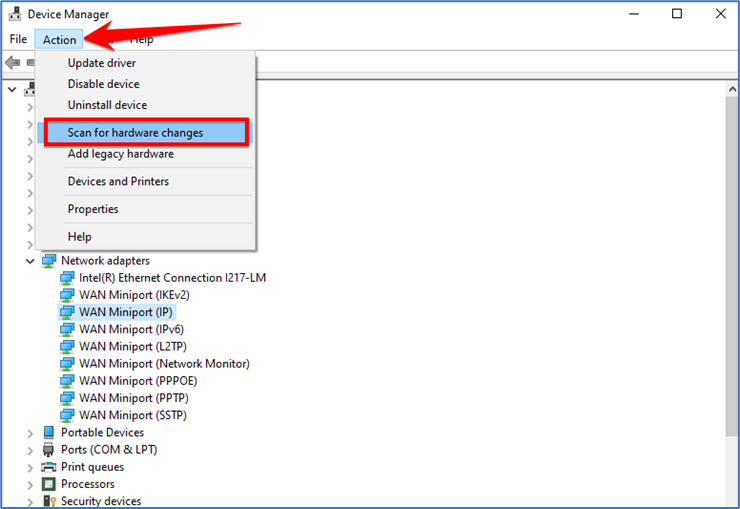
By doing so, the system will initiate the reinstallation process for all the WAN Miniports, effectively restoring them to their previous state. As a result, your VPN connection should now be functioning correctly.
Step 2: Disable Proxy
- First, we have to press the Windows key + R to open the Run command box. Type “inetcpl.cpl” and click OK.

- Click on the Connections tab at the top. Next, click on LAN Settings.
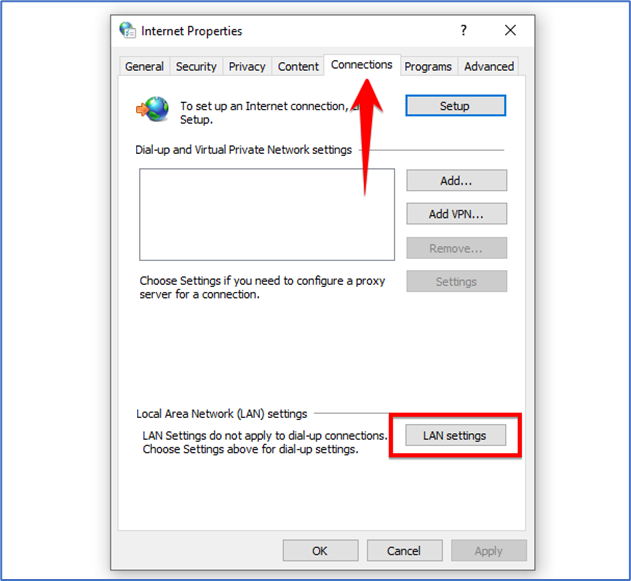
- Ensure the option “Use a Proxy server for your LAN” is unchecked.

Step 3: Turn off the firewall on the server and client-side
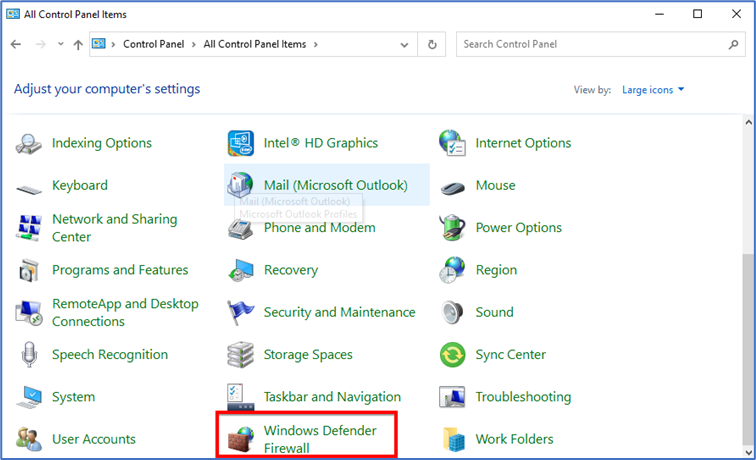
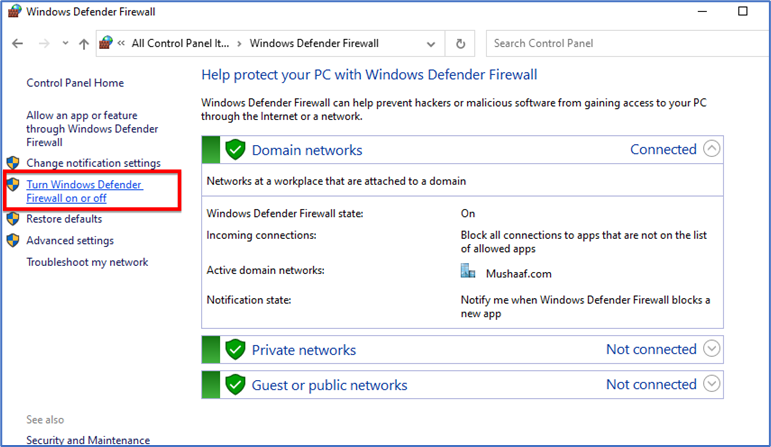
- Press Win + R to open the operation dialog box, enter “control panel” and click OK to open the Control Panel.

- Find and click System and Security on the main interface of the control panel, and then select Windows Defender Firewall.
- Find and click Turn Windows Defender Firewall on or off in the left sidebar.
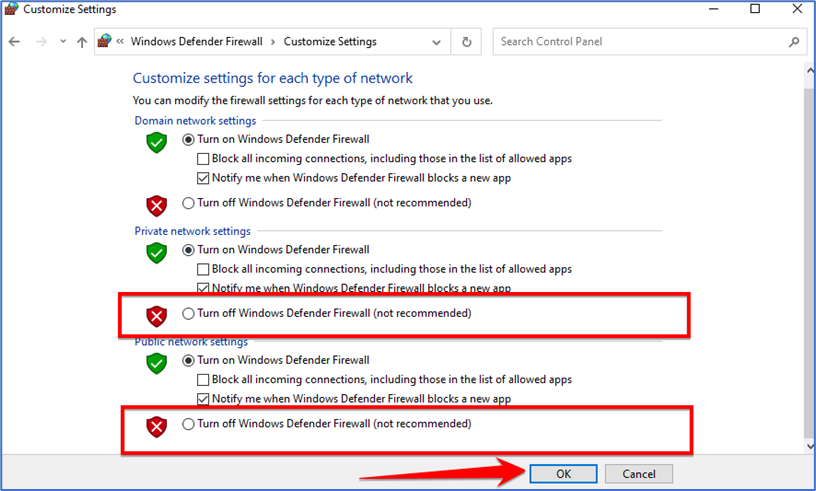
- Select Turn off Windows Defender Firewall under the Private network settings and the public network settings, respectively, and then click OK.
That’s it! You’re done.