In Windows, it is possible to capture a video of your screen without the need for any external applications. Here’s a step-by-step guide to accessing and utilizing Windows’ user-friendly Capture utility to record your display.
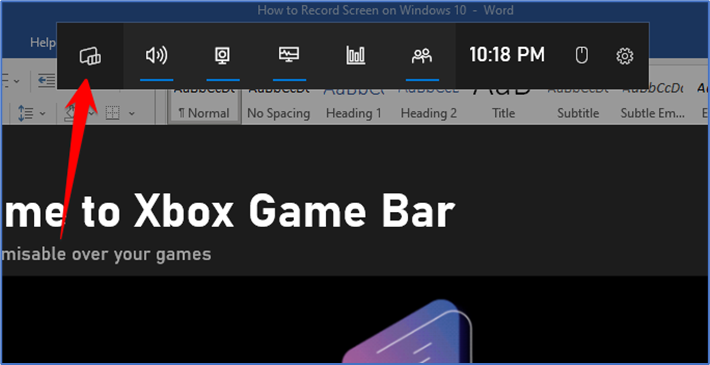
First, press Windows+G to launch the Game Bar. Alternatively, you can open the Start menu and launch the “Xbox Game Bar” application.
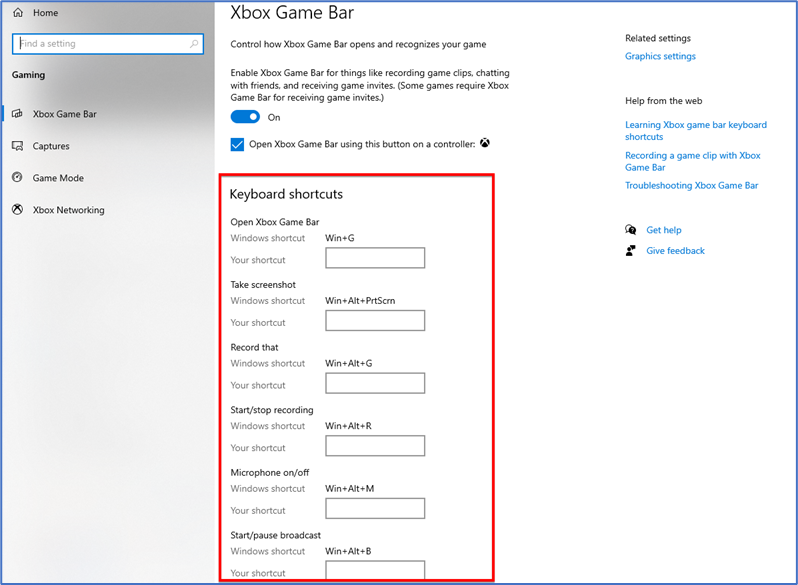
Note: If the Game Bar overlay doesn’t appear, head to Settings -> Gaming -> Xbox Game Bar. Ensure that the Game Bar is switched “On” here. You can also check the keyboard shortcut. You can change “Open Game Bar” to any key combination you like instead of Windows+G

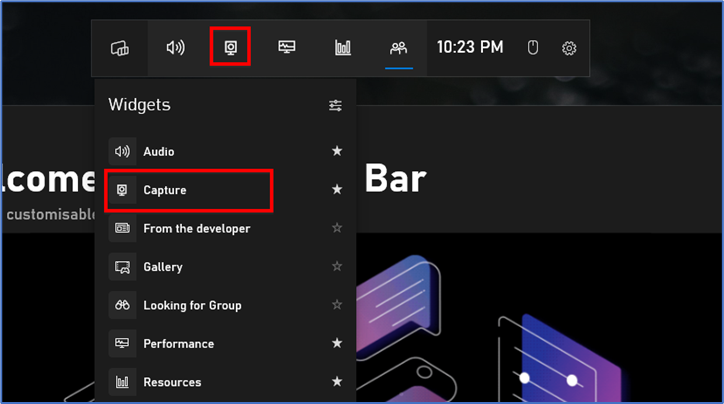
In the Game Bar overlay screen, look for the “Capture” window. (If you don’t see it, click the Widget menu icon on the left. It looks like several lines with bullet points to their left.)
A drop-down menu will appear click “Capture.” The “Capture” shortcut may also be in the Game Bar toolbar.
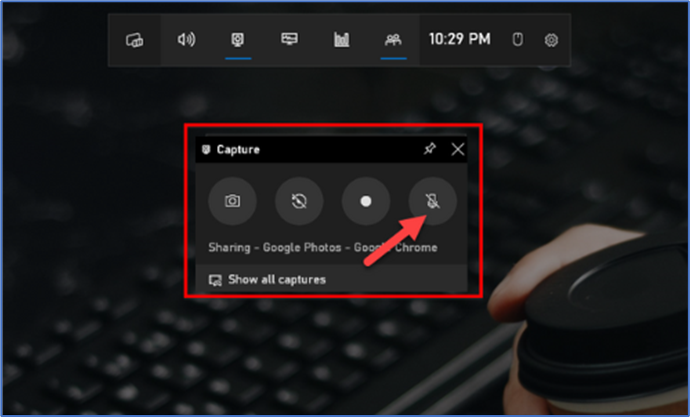
Then you will see there are four buttons on the Capture widget:
- Screenshot: Takes a screenshot of the active window.
- Record last 30 seconds: Creates a recording of the previous 30 seconds.
- Start recording: Start recording your active window.
- Turn on the mic while recording: If this option is enabled, Windows 10 will capture audio from your computer’s microphone and include it in the recording.
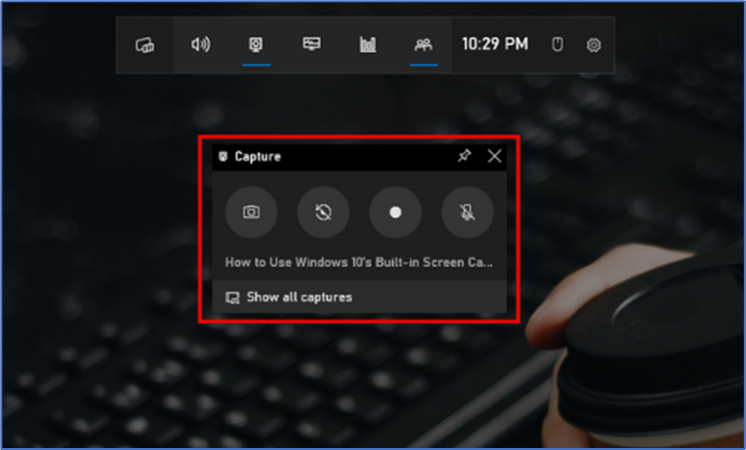
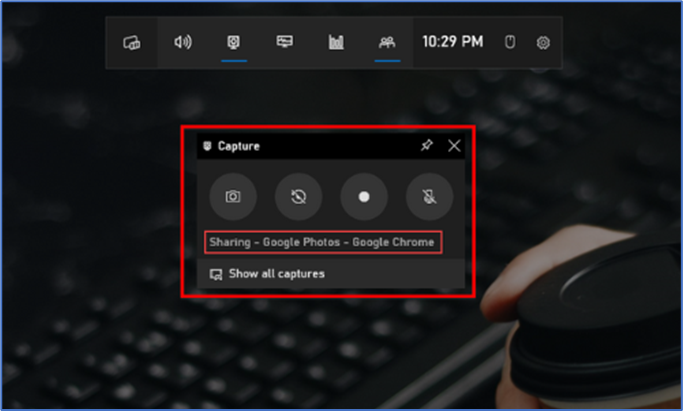
In this tab, you will see text underneath the buttons. This is how you will know what the active window is, aka what will be recorded. For example, if you’re browsing the web, it will show the title of the open tab.
For the start recording of your screen, you must first decide whether you want to use your mic, which is useful if you’re trying to explain something on the screen.
Now click on the start recording button.
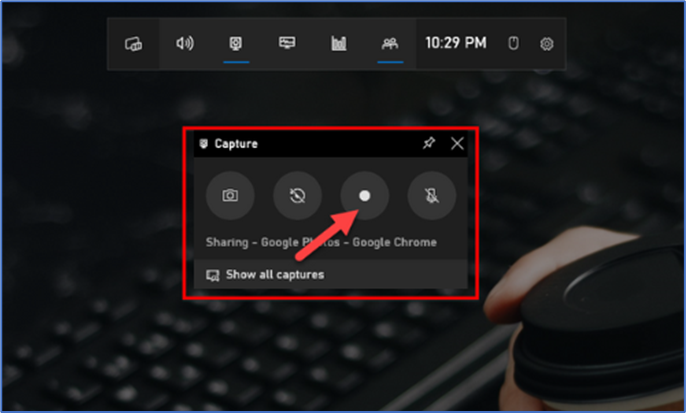
The screen recording will begin, and you will see a little toolbar appear in the corner of the screen. It will show the running time of the recording, and it also has buttons to stop recording and toggle the microphone.

When you’re finished, click on the Stop icon to end the recording, which is automatically saved.

From the Capture widget, click “Show All Captures” to see your recording
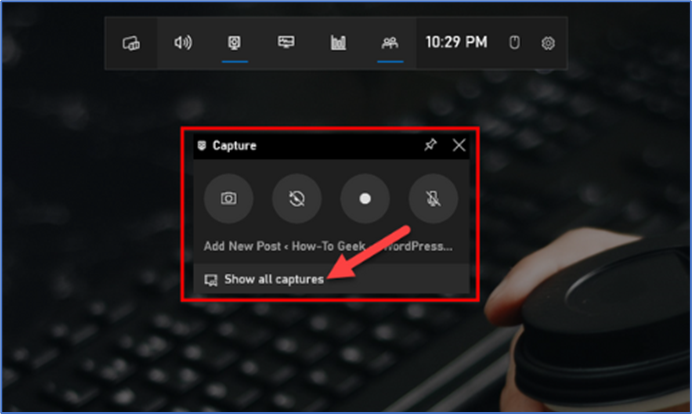
Your recording will be at the top of the list. Click the folder icon to see all recordings and screenshots in File Explorer. These recordings are stored under your Windows user folder at C:\Users\NAME\Videos\Captures by default.

Another way is you can also start recording your screen by pressing Windows+Alt+R by default. Go to Settings -> Gaming -> Xbox Game Bar to customize these keyboard shortcuts.
That’s it!!