You’ll use the integrated Windows Security app on Windows 10 and Windows 11 to turn the firewall on and off. We use a Windows 11 computer for the subsequent steps.
Open Windows Security on your computer to begin. To do this, click the “Start” menu, type “Windows Security,” and then click the app that appears in the search results.
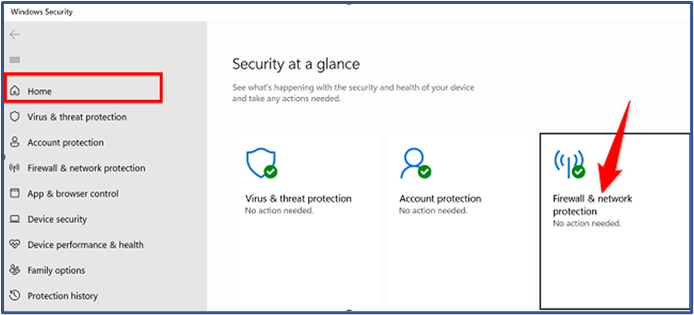
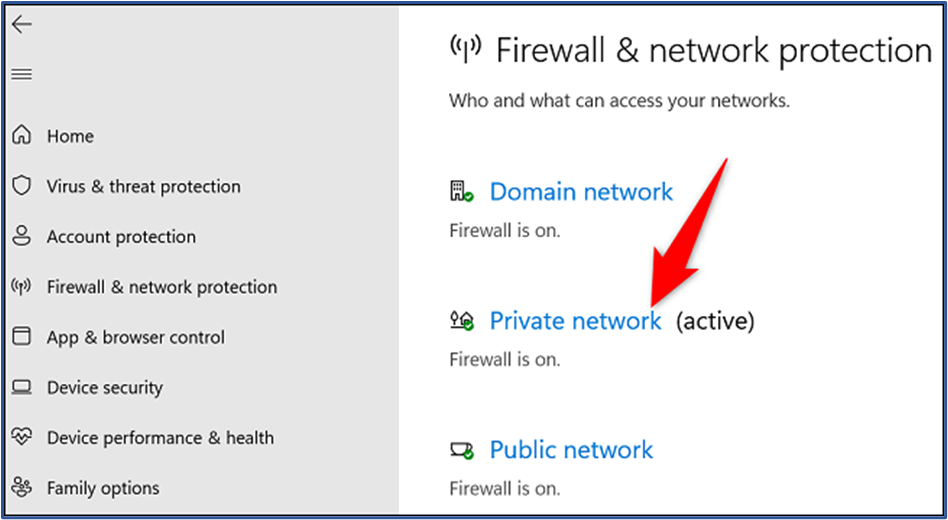
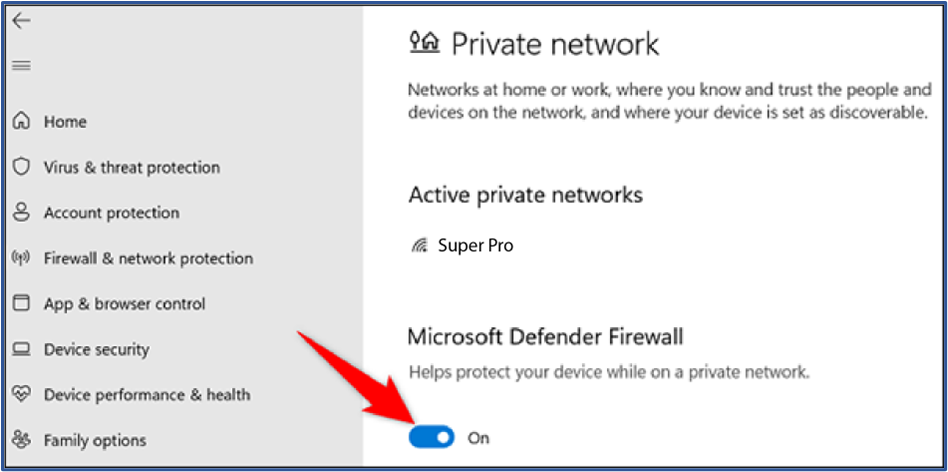
“Firewall & Network Protection” should be clicked in the Windows Security window.Choose your network profile on the “Firewall & Network Protection” page. You’ll see “Active” next to your current profile; select that choice to turn off the firewall for that profile.Toggle the option to disable the firewall in the “Microsoft Defender Firewall” section, then toggle it back on to enable the firewall.The “User Account Control” prompt will ask you to confirm. Click “Yes,” and the Windows firewall will be turned off. You can now carry out more testing, troubleshooting, or related tasks.