Visual Studio Code is a lightweight but powerful source code editor which runs on your desktop and is available for Windows, macOS, and Linux. It comes with built-in support for JavaScript, TypeScript, and Node.js and runtimes such as C++, C#, Java, Python, PHP, Go, and .NET. Use this article to start downloading and installation of the visual studio code.
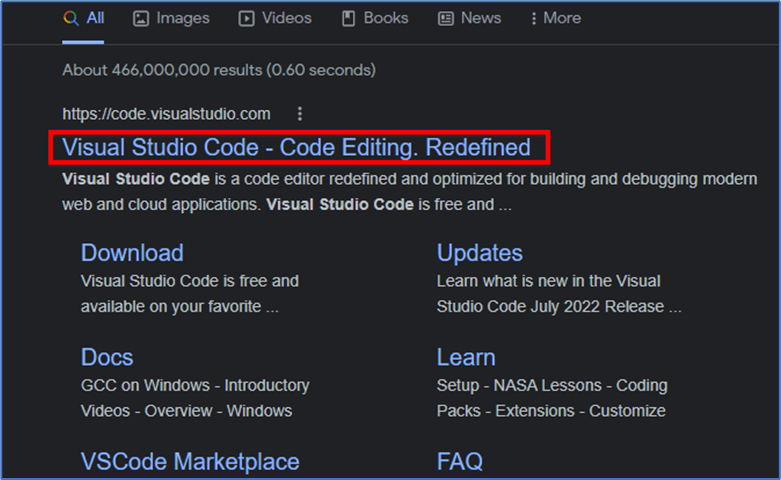
To start with just open your favorite browser and search for visual studio code the first link which will appear here just click on it.
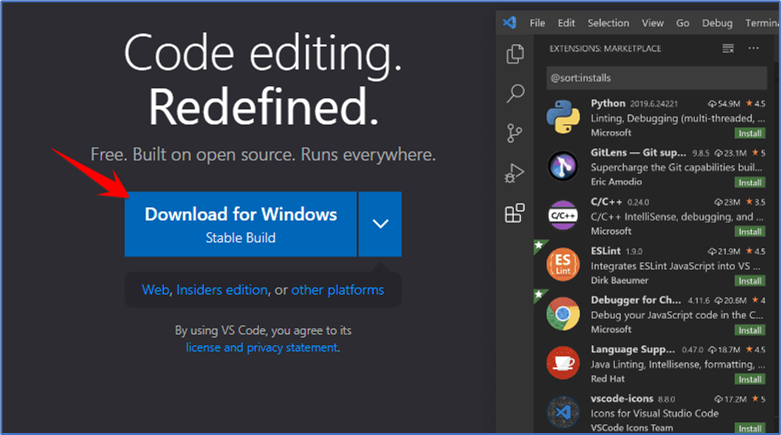
After that when the website is open you will be able to see this blue “Download for Windows” button just click on it.
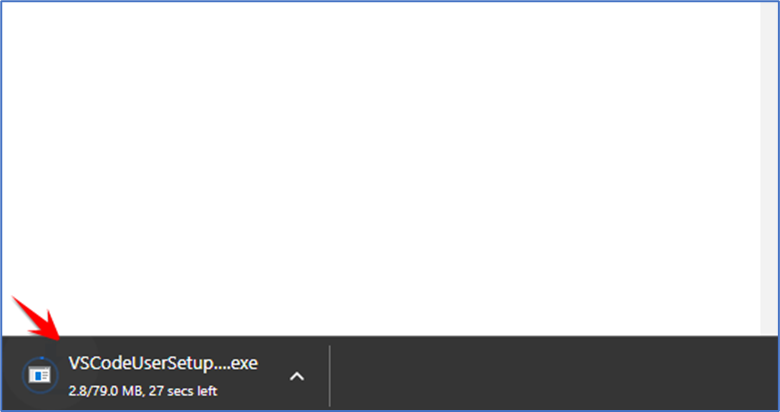
Then you will see that the executable file (.exe) has been started to download
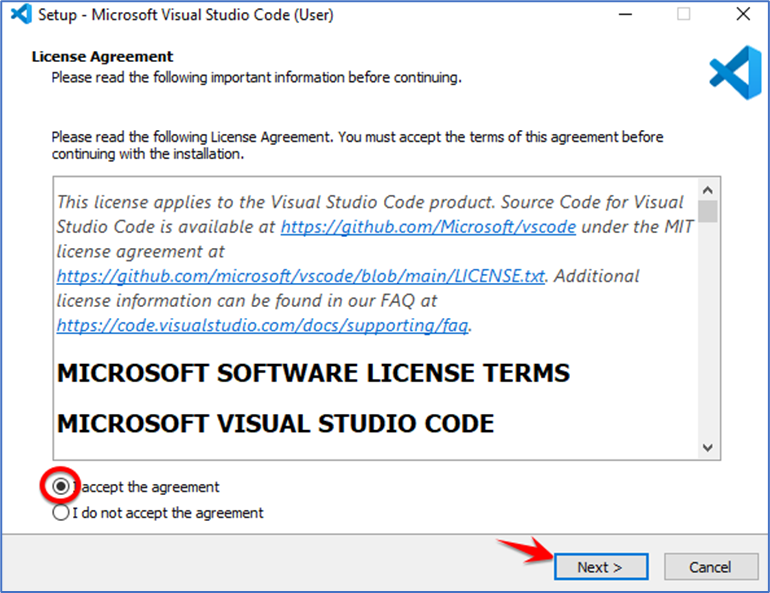
After downloading just click on it and you will see installation has been started just click on agree with the license conditions and click on the next button.
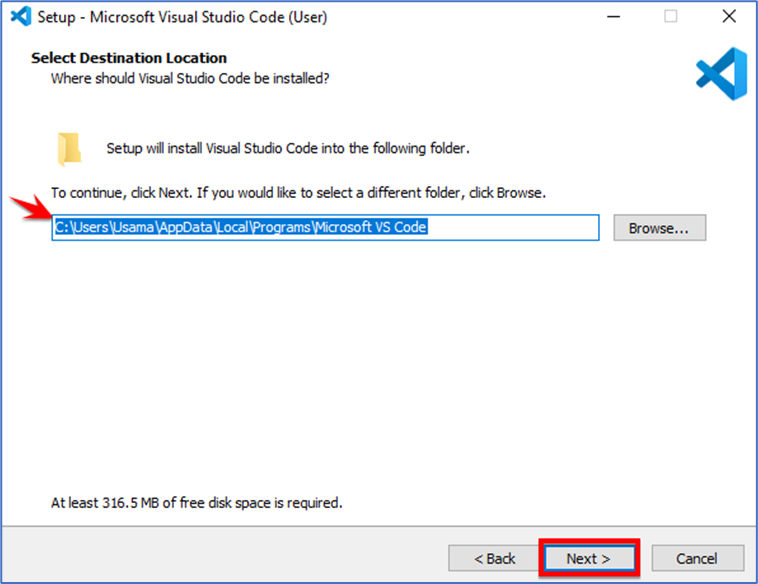
This will be the location where visual studio code will be installed on your operating system so if you don’t have a good reason to change just click on the next button.
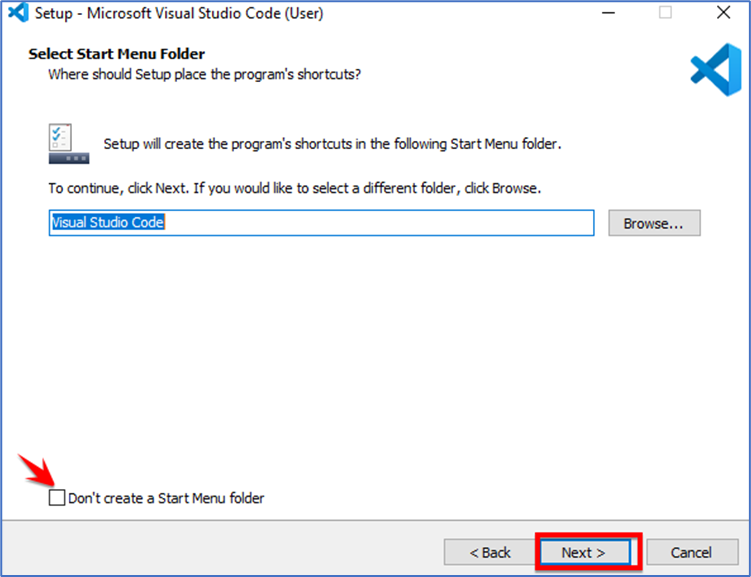
In the next window if you don’t want to “create a start menu folder” so you can just check this box but I am going to just leave it to uncheck and then click on the next button.
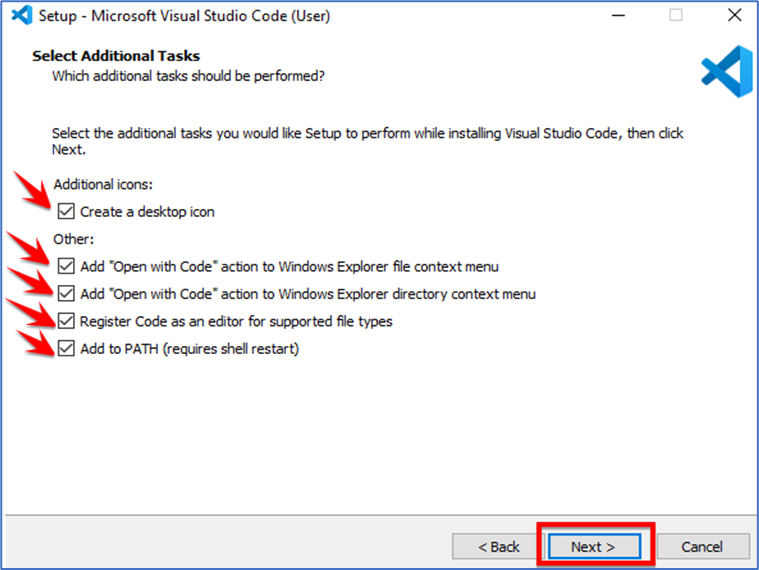
Here are some options which you can choose so if you want to ‘create a desktop icon’ so just check the option there are some other options also which I am going to just check all the options and then I am going to click on the next button.
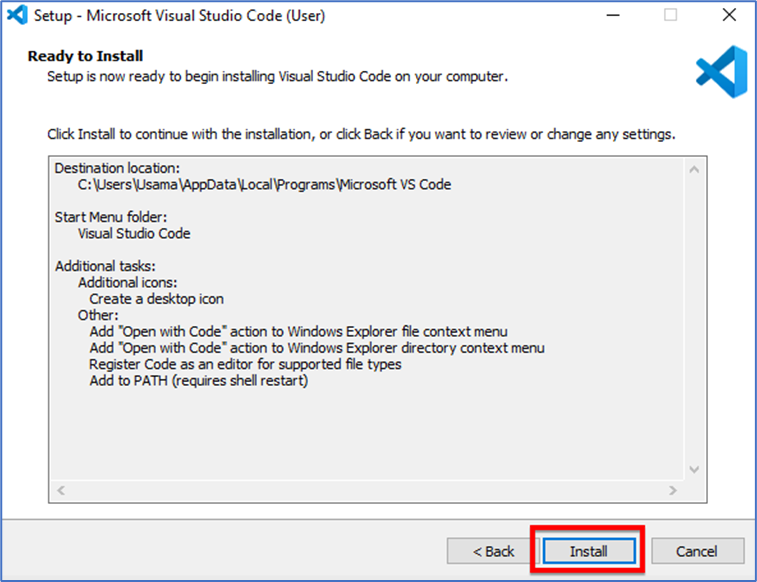
Then click on the install button.
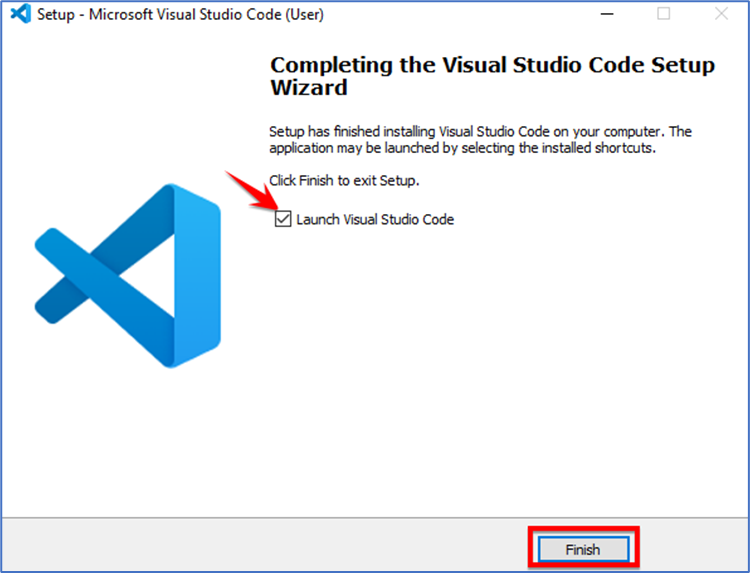
Now you can see the visual studio code setup has been finished and if you want to launch the visual studio code after it installs you just leave this checkbox checked and click on finish
Now your visual studio code has been launched.