If you don’t want the Windows 11 lock screen to time out and turn off your display in under 30 seconds, what can you do? To enable the timeout settings in Windows 11, you must modify the registry. How to edit the registry is shown below.
Setting in the Registry Manually
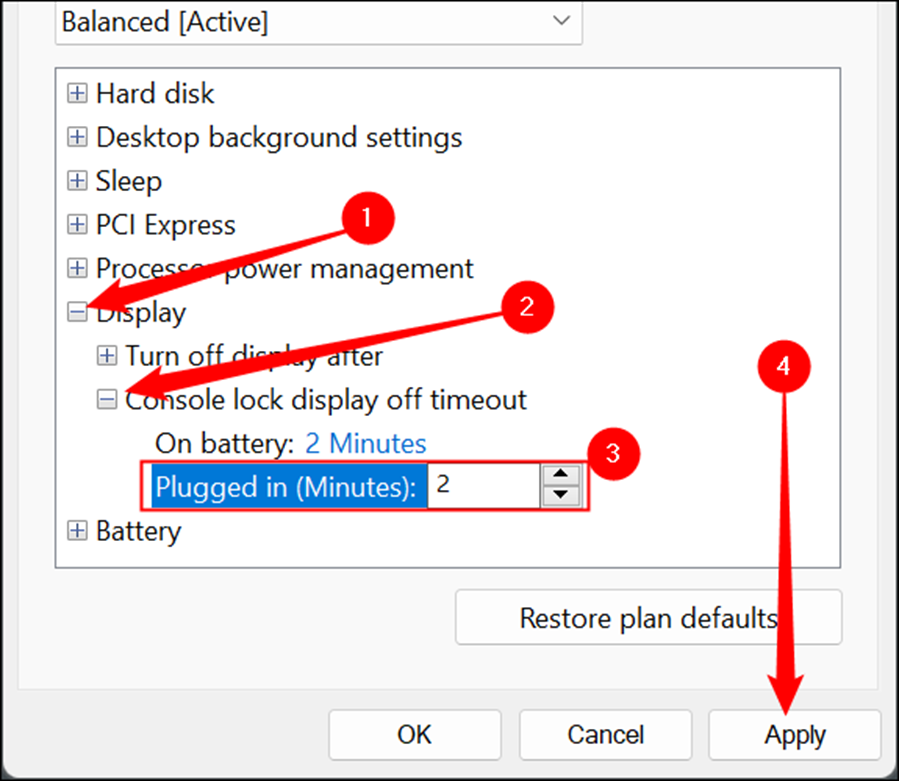
The lock screen timeout setting change option is not by default visible anywhere in Windows 11. The display timeout settings when your PC is not locked have the most in common.
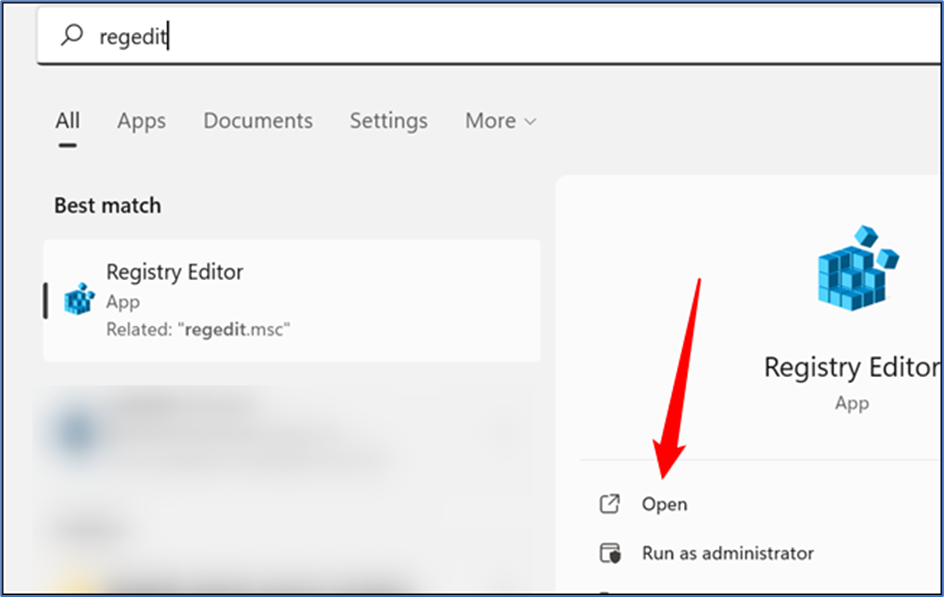
Before you can change the setting, you must first enable it using the Registry Editor (RegEdit). Launch Regedit first by clicking “Open” or entering “regedit” into the search bar in the Start Menu
Open RegEdit and go to the following location:
Advice: You can simply paste the provided path into RegEdit’s address bar.
HKEY_LOCAL_MACHINE\SYSTEM\CurrentControlSet\Control\Power\PowerSettings\7516b95f-f776-4464-8c53-06167f40cc99\8EC4B3A5-6868-48c2-BE75-4F3044BE88A7
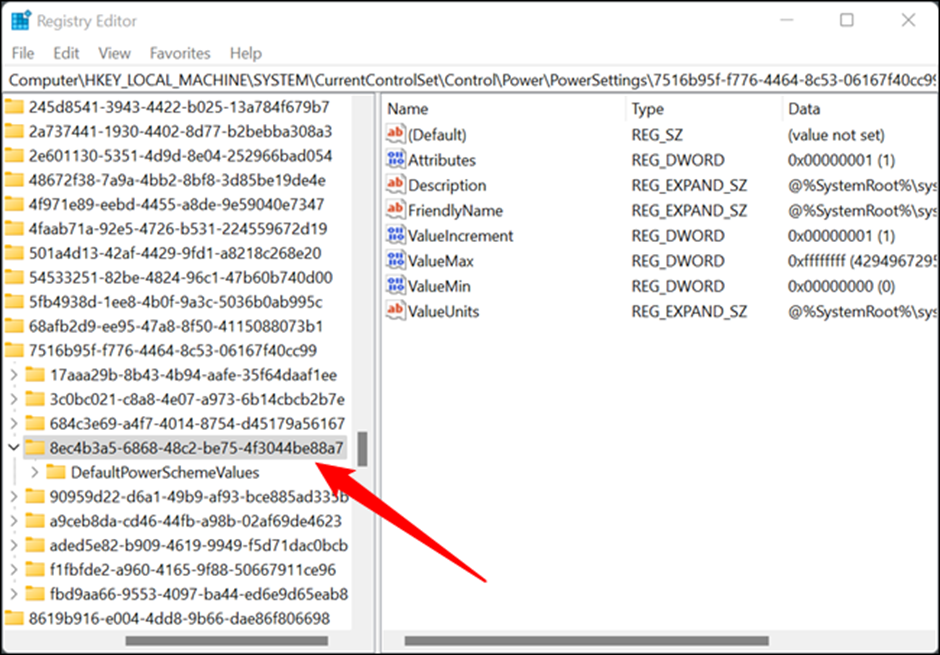
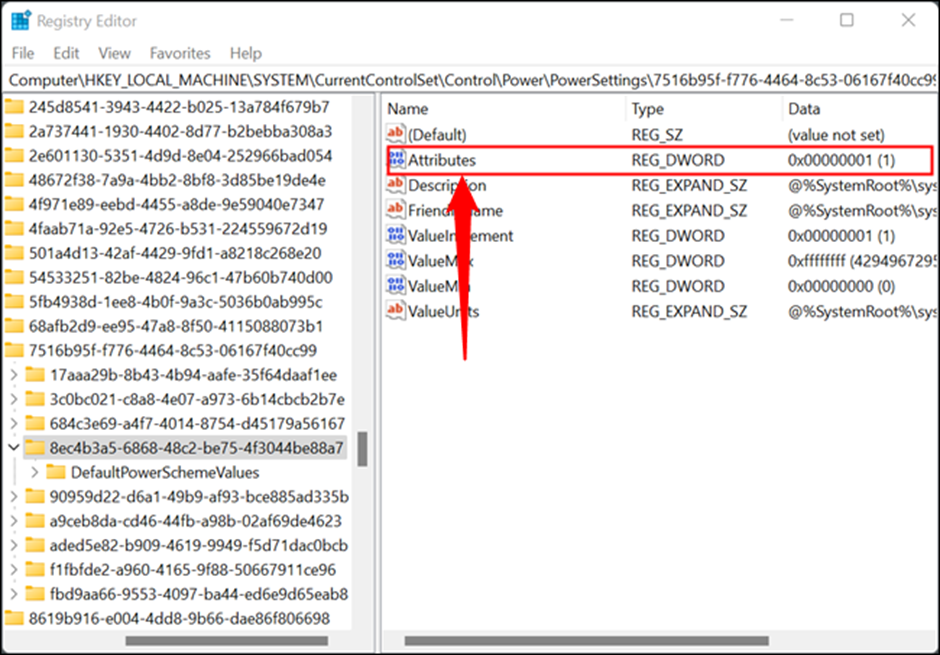
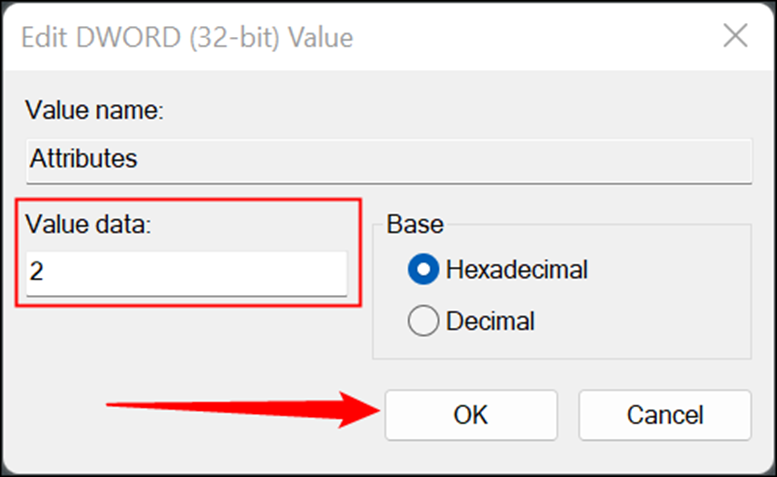
Change “Data Value” from 1 to 2, then click “OK.”
That is the only thing you need to change in the registry, so close out RegEdit.
If you ever want to disable the option, just change the value back to 1.
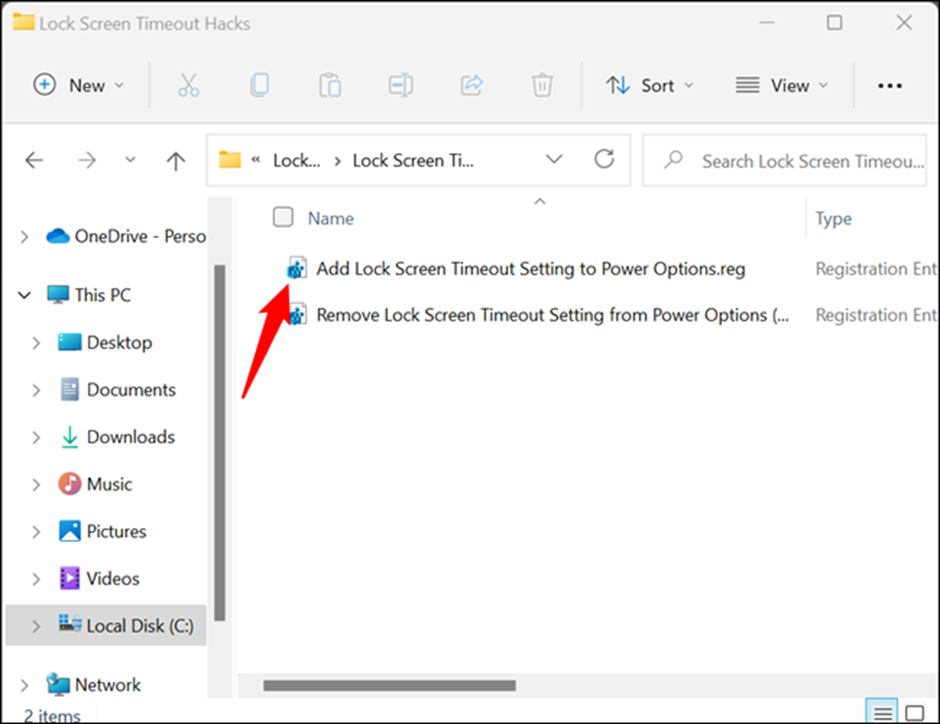
Automate the process by using our REG files.
If you don’t want to go digging through the registry manually — and there are plenty of reasons to want to avoid it — you can just use our pre-made REG files to apply the changes automatically.
Double-click “Add Lock Screen Timeout Setting to Power Options.reg” and click “Yes” at the security prompt. The change to the registry will take effect immediately.
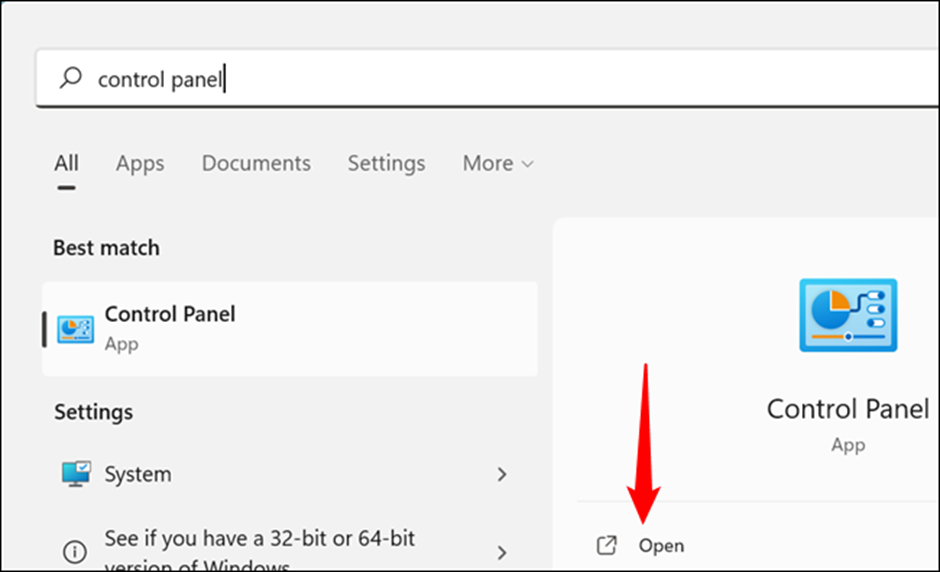
In the Control Panel, access the Power Plan Settings.
Note that the timeout options in the Settings app will not be enabled by this registry hack.
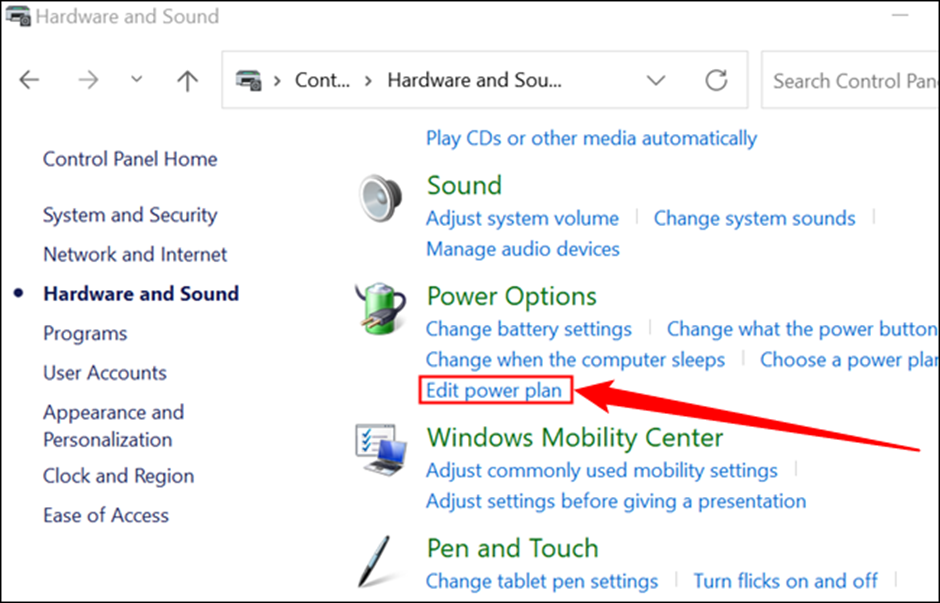
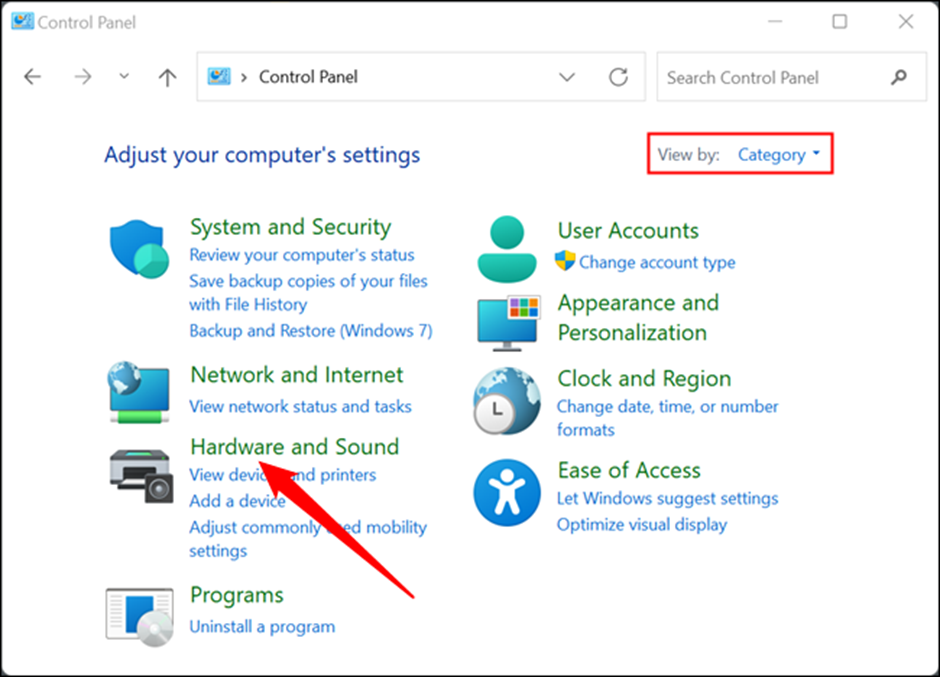
The Power Plan settings in the Control Panel now have controls that allow you to adjust the lock screen timeout. In the Start Menu search box, click the Start button, enter “Control Panel,” and then click “Open” or press Enter.
Click “Hardware and Sound” if your Control Panel is set to “View By: Category.”
Note: If your Control Panel is set to “Small” or “Large,” you can just click “Power Options.”
Select “Edit Power Plan” from the drop-down menu that appears after you find a sizable section marked “Power Options.